Unboxing:
Parts and Buttons:
OrCam Learn Buttons
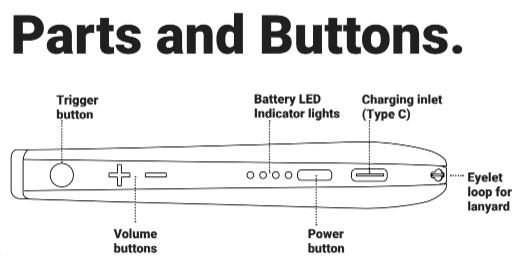
Power Button.
The power button is the thin, oval-shaped button, located near the charging inlet. Use the power button to power the device and enter the audio settings menu.
Trigger Button.
The trigger button is the circle-shaped button, located near the front of the device, above the camera. The majority of functions are performed with the trigger button.
Volume Buttons.
The volume buttons are embossed plus (“+”) and minus (“-”) buttons that are located near the trigger button. Several functions are performed with the volume buttons.
LED Indicators
Battery LED Indicators.
There are 4 blue LED lights next to the power button. Each light represents up to 25% of available battery.
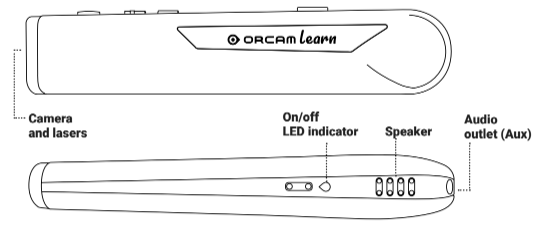
On/Off LED Indicator.
The On/Off LED Indicator is the small, OrCam logo-shaped light located on the bottom of the device. This light will turn orange as the device boots up, and change to blue upon fully awakening.
Suspend Mode and Powering Down
When the device is turned on, entering the Suspend mode allows you to conserve battery life. OrCam Learn automatically enters the Suspend mode after three minutes of inactivity, and will automatically power off after 3 hours in the Suspend mode.
- To enter the Suspend mode, press the power button once.
- To exit the Suspend mode and wake up your device, either press the power button or trigger button once.
- To power down OrCam Learn, long-press the power button.